
Can You Skim Coat Over Wallpaper?

So, you’re staring at that old wallpaper and wondering if you can just skim coat over it, huh?

It’s a question I get a lot, and I totally understand why. Wallpaper can be a real pain to remove sometimes, and skim coating seems like it might be an easy fix.

The thing is, while you can skim coat over wallpaper, it’s not always the best choice.

So, before you decide to go this route, it’s important to understand what you’re getting into, and potential issues you could run into.

In this post, I’ll go over everything you need to know about skim coating over wallpaper.

Can You Skim Coat Over Wallpaper Without Removing It?

Yes, you can skim coat over wallpaper (or even wallpaper glue) without taking it off first. 

This can be a real time-saver, especially when the wallpaper just doesn’t want to come off or if removing it might damage your walls.

But here’s the thing – it’s not always smooth sailing. 

How well it works really depends on what shape your wallpaper is in. 

If it’s stuck on there good and tight, you might be okay. But if it’s peeling or bubbling anywhere, you could run into some trouble.

I’ll talk about some of the risks later on in the post.

Also Read: Do You Prime Before Texture?

How To Skim Coat Over Wallpaper

Here’s a step by step guide on how to skim over your wallpaper properly: 

#1 Assess The Situation

Before you jump in, take a good look at your walls. 

Are there large sections of loose wallpaper? Is the paper peeling off in some areas but not others? These are all things you need to consider. 

You should only skim coat if the existing wallpaper is still in relatively good condition.

#2 Address Problem Areas

Now that you’ve decided to go ahead with skim coating, it’s time to get your walls ready. You need to make sure your wallpaper is as smooth and well-adhered as possible.

Walk around your room and run your hands over the walls. Feel for any bubbles and loose edges. These are the spots you’ll need to address. 

Outlets, light switches, and corners are usually where wallpaper starts to give up the ghost first. 

You can cut away these loose sections and bubbles with a utility knife.

You can use some wallpaper paste if needed too.

#3 Prepare Corners And Seams

Now that we’ve dealt with the problem areas, let’s focus on the corners and seams. 

In the corners where you’ve cut out the wallpaper, you’ll want to make sure you have a clean, straight edge to work with. 

This might mean doing a bit more cutting or even sanding to get things just right.

As for those seams where one piece of wallpaper meets another, we can’t just ignore them. If we did, they might show through our skim coat, and that’s definitely not the professional look we’re aiming for. 

We’ll need to reinforce these areas to make sure they don’t cause us problems down the line.

Also Read: Preparing Walls for Painting After Removing Wallpaper

#4 Apply Drywall Tape

Time to break out the tape! For the corners, we’re going to use good old-fashioned paper tape. It might not look like much, but it’s perfect for creating those sharp, clean edges we want. 

Apply it carefully, making sure it’s straight and well-adhered.

For the seams between wallpaper pieces, I like to use fiber fuse drywall tape. It’s easy to work with and does a great job of reinforcing those potential weak spots. 

If you can’t find fiber fuse, fiberglass mesh tape will do the trick too. 

Just remember, if you go with mesh, you’ll need to use a quick-setting compound instead of regular joint compound.

#5 Mud And Tape As Normal

The Process Of Smearing Plaster

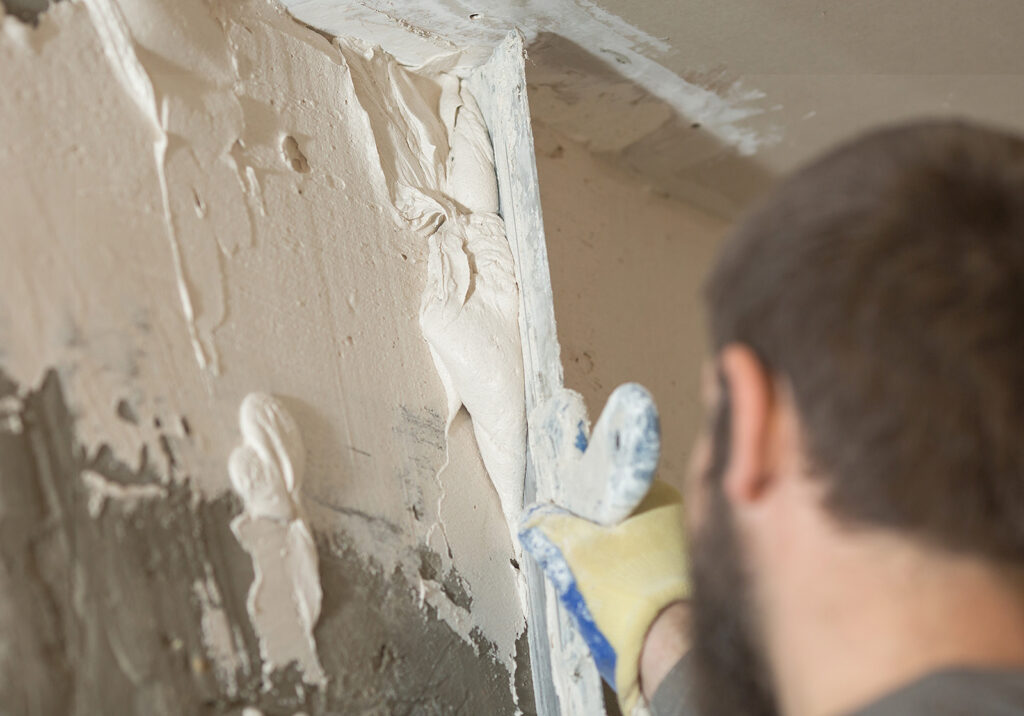
Now we’re getting to the heart of the matter – the actual skim coating. 

Treat this just like you would any other skim coating job

Apply your joint compound over the tape, making sure to spread it evenly. Use your taping knife to smooth it out, feathering the edges so they blend seamlessly with the surrounding areas.

You’ll probably need to apply multiple coats to get a really smooth finish. 

Don’t try to do it all in one go – thin, even layers are the key to success here. Pay extra attention to those taped areas – they can be a bit trickier to get smooth. 

And don’t forget to let each coat dry completely before adding the next one.

#6 Sanding

Once your final coat of joint compound is completely dry, it’s time to sand. Use a fine-grit sandpaper and take your time. The goal here is to create a surface that’s smooth as glass. 

Run your hands over the walls – they should feel perfectly even, with no bumps or dips.

#7 Finish And Review

Now step back and take a good look at your work. 

Are there any spots that need touching up? 

Any areas where you can still see a hint of the old wallpaper texture? 

Now’s the time to address these issues. It might mean applying another small patch of compound or doing a bit more sanding, but it’s worth it to get a truly professional-looking finish. 

When you’re done, your walls should look like they were never wallpapered in the first place.

Risks Of Skim Coating Over Wallpaper

Now let’s talk about some of the risks involved in skim coating over wallpaper. It’s important to know what you’re getting into:

Also Read: How Long For Home Wood Rot?

Adhesion Problems

One of the biggest issues is getting the joint compound to stick properly. 

Wallpaper isn’t always the best surface for this, especially if it’s got a shiny finish. 

If the compound doesn’t stick well, you might end up with cracks or peeling down the line.

This is why you need to make sure the wallpaper is in good shape and maybe even use a special bonding agent to help everything stick together.

Wallpaper Might Peel Or Bubble

Even if your wallpaper looks well-adhered now, the moisture from the joint compound could cause problems sometimes. 

The water in the compound can sometimes seep through to the wallpaper adhesive..

This can lead to bubbling or peeling of the wallpaper underneath your newly skim coated surface. 

The tricky part is that this doesn’t always happen right away. You might think everything’s fine, and then months later, you start seeing issues. 

Uneven Surface

If your wallpaper has any kind of texture or pattern, it might show through your skim coat. 

This can leave you with a surface that’s not quite as smooth as you want, and it might even be noticeable after painting.

You might need to put on several layers of joint compound to fix this.

Harder To Remove The Wallpaper Later

Here’s something to think about for the future – if you skim coat over your wallpaper, it’s going to be much harder to remove it later on. 

The joint compound will stick to the wallpaper, basically gluing it to the wall even more.

If you ever try to take it off, you’ll probably end up damaging the wall underneath. 

So before you start skim coating, make sure you’re okay with that.

Bottom Line

Interior Of A Room Finished Drywall

Skimming over wallpaper isn’t always recommended, but sometimes it’s the best option we’ve got. Take your time, follow these steps, and you’ll end up with walls that are smooth and ready for whatever color you throw at them.

How we Prep Walls for Painting After Removing Wallpaper

Proper wall preparation after removing wallpaper is crucial for achieving a smooth and lasting paint finish. By following the right steps, you can ensure your walls are in the best condition for painting. 

This guide provides a comprehensive overview of the process, including tips and tricks to make the job easier and more effective.

Key Takeaways

  1. Thoroughly Clean the Walls: We always want to make sure all adhesive residue is removed for a smooth surface that’s ready for painting.
  2. Repair and Sand: Patch up any holes or cracks and give the walls a good sanding to achieve a flawless finish.
  3. Apply a Quality Primer: A high-quality primer can be helpful to seal the walls and provide a perfect base for your paint.
  4. Choose the Right Paint: Picking the right type and finish of paint is important to ensure durability and a beautiful look.
  5. Use Proper Painting Techniques: Use the best painting techniques and tools to achieve a professional and long-lasting result.

Our Step-by-Step Process to Prepping Walls for Painting

Tools and Materials Needed

Before starting, we make it a habit to gather all our materials and supplies so we can efficiently finish your project:

  • Wallpaper removal tools: Scraper, wallpaper steamer, or wallpaper removal solution
  • Cleaning solutions: TSP (trisodium phosphate) or a vinegar and water mixture
  • Sandpaper: Medium and fine grit
  • Wall primer: High-quality options – like Kilz
  • Spackling compound: For patching holes and cracks
  • Paintbrushes and rollers: For applying primer and paint

Having these items on hand streamline the process.

Step 1: Removing Wallpaper

We start by removing the wallpaper. Depending on the type of wallpaper and adhesive used, a scraper, steamer, or wallpaper removal solution may be needed. We will apply the removal solution or steam to loosen the adhesive, then carefully scrape off the wallpaper. Patience is key during this step to avoid damaging the underlying wall.

Step 2: Cleaning Walls After Removing Wallpaper

After removing the wallpaper, adhesive residue will likely remain. This step ensures your walls are clean and ready for the next stages.

  • How to clean walls after removing wallpaper: We will mix a solution of TSP or vinegar and water. Use a sponge to scrub the walls, removing all traces of wallpaper paste. then we rinse with clean water and allow the walls to dry completely.

Step 3: Repairing and Smoothing Walls

Removing wallpaper can reveal cracks, holes, and uneven surfaces that need attention.

  • Patching holes and cracks: Using a spackling compound, we will fill in any holes or cracks by applying a spackle with a putty knife, smoothing it out, and letting it dry.
  • Sanding walls: Once the spackle is dry, we sand the walls with medium-grit sandpaper, followed by fine-grit paper for a smooth finish. This step is crucial for creating a perfect surface for painting.

Step 4: Applying Primer

Priming is essential for ensuring the paint adheres properly and helps to hide any imperfections.

  • Do you need to prime walls after removing wallpaper?: Priming helps to seal the wall and provides a uniform base for the paint.
  • Best primers to use after removing wallpaper: High-quality primers like Kilz work well. We apply the primer evenly with a roller and use a brush for edges and corners then allow it to dry completely before painting.

Step 5: Skim Coating (If Necessary)

Sometimes, even after sanding, walls may need an extra layer to smooth out imperfections. This is where skim coating comes in.

  • Cost to skim coat walls after removing wallpaper: Skim coating can be a bit pricier, but it is worth it for a flawless finish. You can DIY or hire a professional depending on your budget.
  • How to apply a skim coat: Spread a thin layer of joint compound over the wall using a trowel. Smooth it out and let it dry, then sand it lightly for a smooth surface.

Common Challenges and Solutions

Dealing with Stubborn Adhesive Residue

For stubborn adhesive that refuses to budge, products like Goo Gone or a mixture of warm water and dish soap can help break down the residue. We make sure to scrub gently with a sponge or cloth until the adhesive is gone.

Addressing Surface Imperfections

Surface imperfections that are too minor for spackling but still noticeable can often be resolved with sanding. If not, a second skim coat might be necessary but rest assured we will make sure your walls are nice and smooth before painting.

Ensuring Proper Paint Adhesion

To ensure your paint adheres well and lasts long, we make sure your walls are completely clean, dry, and primed. Proper wall preparation makes all the difference in the final outcome.

Additional Tips for Best Results

Choosing the Right Paint

When it comes to painting walls that were previously wallpapered, selecting the right type of paint is very important to achieving a smooth and durable finish.

Best types of paint for previously wallpapered walls:

  1. Latex Paint: This is a popular choice due to its durability and ease of cleaning. Latex paint is also less likely to show brush strokes and is more resistant to moisture.
  2. Acrylic Paint: Known for its strong adhesion properties, acrylic paint is excellent for surfaces that might have slight imperfections.
  3. Primer and Paint in One: These combination products can save time and effort by providing both a primer and a topcoat in one application. They work well for walls that are already in good condition.

Tips for selecting the right paint finish:

  1. Matte Finish: Ideal for hiding imperfections but can be less durable and harder to clean.
  2. Eggshell Finish: Offers a slight sheen and is more washable than a matte finish, making it a good middle-ground option.
  3. Satin Finish: Provides a smooth, velvety look with better durability and washability, suitable for high-traffic areas.
  4. Semi-Gloss and Gloss Finishes: Highly durable and easy to clean, these finishes are best for areas that require frequent cleaning, such as kitchens and bathrooms.

Painting Techniques

Achieving a professional finish involves more than just choosing the right paint; it’s also about how our team applies it.

Our best practices for painting your prepared walls:

  1. Use High-Quality Tools: At Let’s Upgrade Painting we always invest in good-quality brushes and rollers. A high-quality roller will distribute paint more evenly and cover more area, while a good brush will handle edges and corners with precision.
  2. Apply Even Coats: It’s important that we don’t overload a brush or roller with paint. Instead, we focus on applying smooth, even coats, allowing each to dry completely before applying the next. This helps prevent drips and ensures a smooth finish.
  3. Work in Sections: We Paint one section of the wall at a time, usually about a 3×3 foot area. This approach helps to maintain a wet edge and avoid visible lines where one section dries before rolling the next.

Tools and methods we use for a professional finish:

  1. Roller Techniques: A ‘W’ or ‘M’ motion with the roller helps to distribute paint evenly and reduce streaks. This technique helps cover the surface more effectively as well.
  2. Cutting In: Using an angled brush to ‘cut in’ around the edges of walls, ceilings, and trim before using the roller. This creates clean lines and ensures that these areas receive adequate paint coverage.
  3. Feathering: Feather out the edges of our brush strokes or roller marks to blend seamlessly with the rest of the wall. This technique is especially important when working with glossy or semi-gloss finishes.

Maintenance After Painting

Once your walls are beautifully painted, proper maintenance is key to keeping them looking fresh and vibrant for years to come.

How to care for newly painted walls:

  1. Allow Proper Drying Time: Make sure the paint has completely cured before subjecting the walls to regular use. This can take anywhere from a few days to a couple of weeks, depending on the paint type and environmental conditions.
  2. Regular Cleaning: Dust your walls regularly to prevent dirt buildup. For more thorough cleaning, use a soft cloth or sponge with mild soapy water. Avoid abrasive cleaners that can damage the paint.

Tips for maintaining a fresh look:

  1. Touch-Up Paint: Keep some leftover paint for touch-ups. Minor nicks and scratches can be easily fixed with a small brush and a bit of paint.
  2. Avoid Excess Moisture: In areas prone to humidity, such as bathrooms, use exhaust fans to reduce moisture levels. This helps prevent mold and mildew growth, which can damage the paint.
  3. Inspect Regularly: Periodically check your walls for signs of damage or wear. Addressing small issues promptly can prevent them from becoming larger problems.

Frequently Asked Questions (FAQs)


What to Do Before Painting After Removing Wallpaper?

Before painting, make sure your walls are clean, repaired, sanded, and primed. This ensures the paint adheres well and looks great.

How Do You Clean Walls After Removing Wallpaper?

Clean walls with a solution of TSP or vinegar and water to remove all adhesive residue. Rinse with clean water and let dry completely.

What is the Best Primer for Walls After Wallpaper Removal?

High-quality primers like Kilz or Zinsser are excellent choices. They provide a solid base for your paint and help cover any imperfections.

How to Seal Walls After Removing Wallpaper?

Sealing walls involves applying a primer to create a uniform base for painting. This step is crucial for paint adhesion and durability.

Do You Need to Plaster a Wall After Removing Wallpaper?

Plastering isn’t always necessary. However, if the walls are significantly damaged or uneven, a skim coat or plaster might be needed to achieve a smooth surface.

How to Prepare Old Wallpapered Walls for Painting?

For older walls, extra care might be needed. Ensure all old adhesive is removed, and consider a skim coat to smooth out any imperfections before priming and painting.

Conclusion

Prepping walls for painting after removing wallpaper might seem like a major task, but following the right steps and using the proper tools can make the process smooth and efficient. If you have a project coming up that you would rather use us to help with please reach out and contact us about your Wallpaper Removal or Residential Painting needs! Our thorough preparation leads to a beautiful, long-lasting paint finish.